🦮 OPToggle Demo
Let's walk you through setting up your first open policy based feature toggles, integrated with LaunchDarkly!
The demo code and example files available here.
Step 1 - Preparation
In the prepataion step, we are creating a user-targeted policy that we need for OPToggles. We're going to create user data and policy files, and declare them in a manifest file.
Exmaple data
You can clone our data.json example policy repo.
In our example data.json you can find:
- Three users: Alice, Bob, and Eve.
- The three of them are US users with the same IP.
- Each user have a different role (i.e. bob is a billing user).
- Each role have different permissions (i.e. finance role can read and update "finance").
{
  "users": {
    "alice": {
      "roles": ["admin"],
      "location": {
        "country": "US",
        "ip": "8.8.8.8"
      }
    },
    "bob": {
      "roles": ["employee", "billing"],
      "location": {
        "country": "US",
        "ip": "8.8.8.8"
      }
    },
    "eve": {
      "roles": ["customer"],
      "location": {
        "country": "US",
        "ip": "8.8.8.8"
      }
    }
  },
  "role_permissions": {
    "customer": [
      {
        "action": "read",
        "type": "dog"
      },
      {
        "action": "read",
        "type": "cat"
      },
      {
        "action": "adopt",
        "type": "dog"
      },
      {
        "action": "adopt",
        "type": "cat"
      }
    ],
    "employee": [
      {
        "action": "read",
        "type": "dog"
      },
      {
        "action": "read",
        "type": "cat"
      },
      {
        "action": "update",
        "type": "dog"
      },
      {
        "action": "update",
        "type": "cat"
      }
    ],
    "billing": [
      {
        "action": "read",
        "type": "finance"
      },
      {
        "action": "update",
        "type": "finance"
      }
    ]
  }
}
Example policy
OPA uses Rego code - a high-level declarative language.
Rego can be used to write any type of rule, including simple and complex rules with loops, function calls, and more.
For our example, let's create a new features.rego file with the following rules.
The Rego code is based on the structure of the data.json file we created in the previous step:
package app.rbac

billing_users[users] {
  some user, i
  data.example.users[user].roles[i] == "billing"
  users := user
}

us_users[users] {
  some user
  data.example.users[user].location.country == "US"
  users := user
}
Let's go over the Rego code quickly:
- We declare two sets of users:
billing_usersandus_users.billing_usersholds a set of all users that their role is "billing".us_usersholds a set of all users that their country is "US".
- We use the "data." prefix to reach the data.json content.
Our example data.json code have bob as a billing user and alice, bob, and eve as US users. You can follow this link to test the Rego part of the demo separately.
Manifest file
Create a .manifest file listing the policy and data files paths.
You can copy our example.
Step 2 - Setup OPAL and OPA
We'll use docker-compose for setting up OPAL and OPA.
We're going to need an OPA instance, managed by OPAL for realtime policy and policy data
updates. Our starting point would be one of OPAL's
examples docker-compose configurations
.
To learn more about working with OPAL container images
view this guide)
We want to feed OPA with that data & policies, for that - we'll use OPAL'
s git-tracking capabilities:
Edit our docker-compose.yaml to configure OPAL Server to track the right git repo, branch & .manifest file:
  opal_server:
    environment:
      - OPAL_POLICY_REPO_URL = https://github.com/permitio/OPToggles
      - OPAL_POLICY_REPO_MAIN_BRANCH = master
      - OPAL_POLICY_REPO_MANIFEST_PATH = example/.manifest
      - OPAL_POLICY_REPO_POLLING_INTERVAL = 30
Once updating the docker-composer yaml file, you can already use OPAL with your backend to authorize requests using realtime data, and deny users forbidden actions.
But getting an 401 Unauthorized (or another error message, as elegant as it might be) in the client side isn't exactly
the best UX experience :)
Step 3 - Setup LaunchDarkly
That's where the magic of feature management platforms comes in: LaunchDarkly enables you to manage feature toggles
across multiple projects and deployment environments, and has rich client-side sdk support already used by many
developers to turn UI features on & off.
If you don't already have a LaunchDarkly account, create it here.
Next thing you would need is a project and one or more environment. You can manage those under Account settings
-> Projects.
Each LaunchDarkly account can contain multiple projects for different products. In this example we're going to use the
pre-existing default project.
Your feature toggles can have configurations for different deployment environments.
In our example - we will use two pre-defined environments: production & test.
LaunchDarkly project settings should look like that:

From now on - OPToggles would take care of toggle creation and updates thorugh LaunchDarkly for us.
In order to use OPToggle you need an API key, that is available for Professional plans or higher at
the moment.
You can create a token under Account settings -> Authorization, or
using this link.
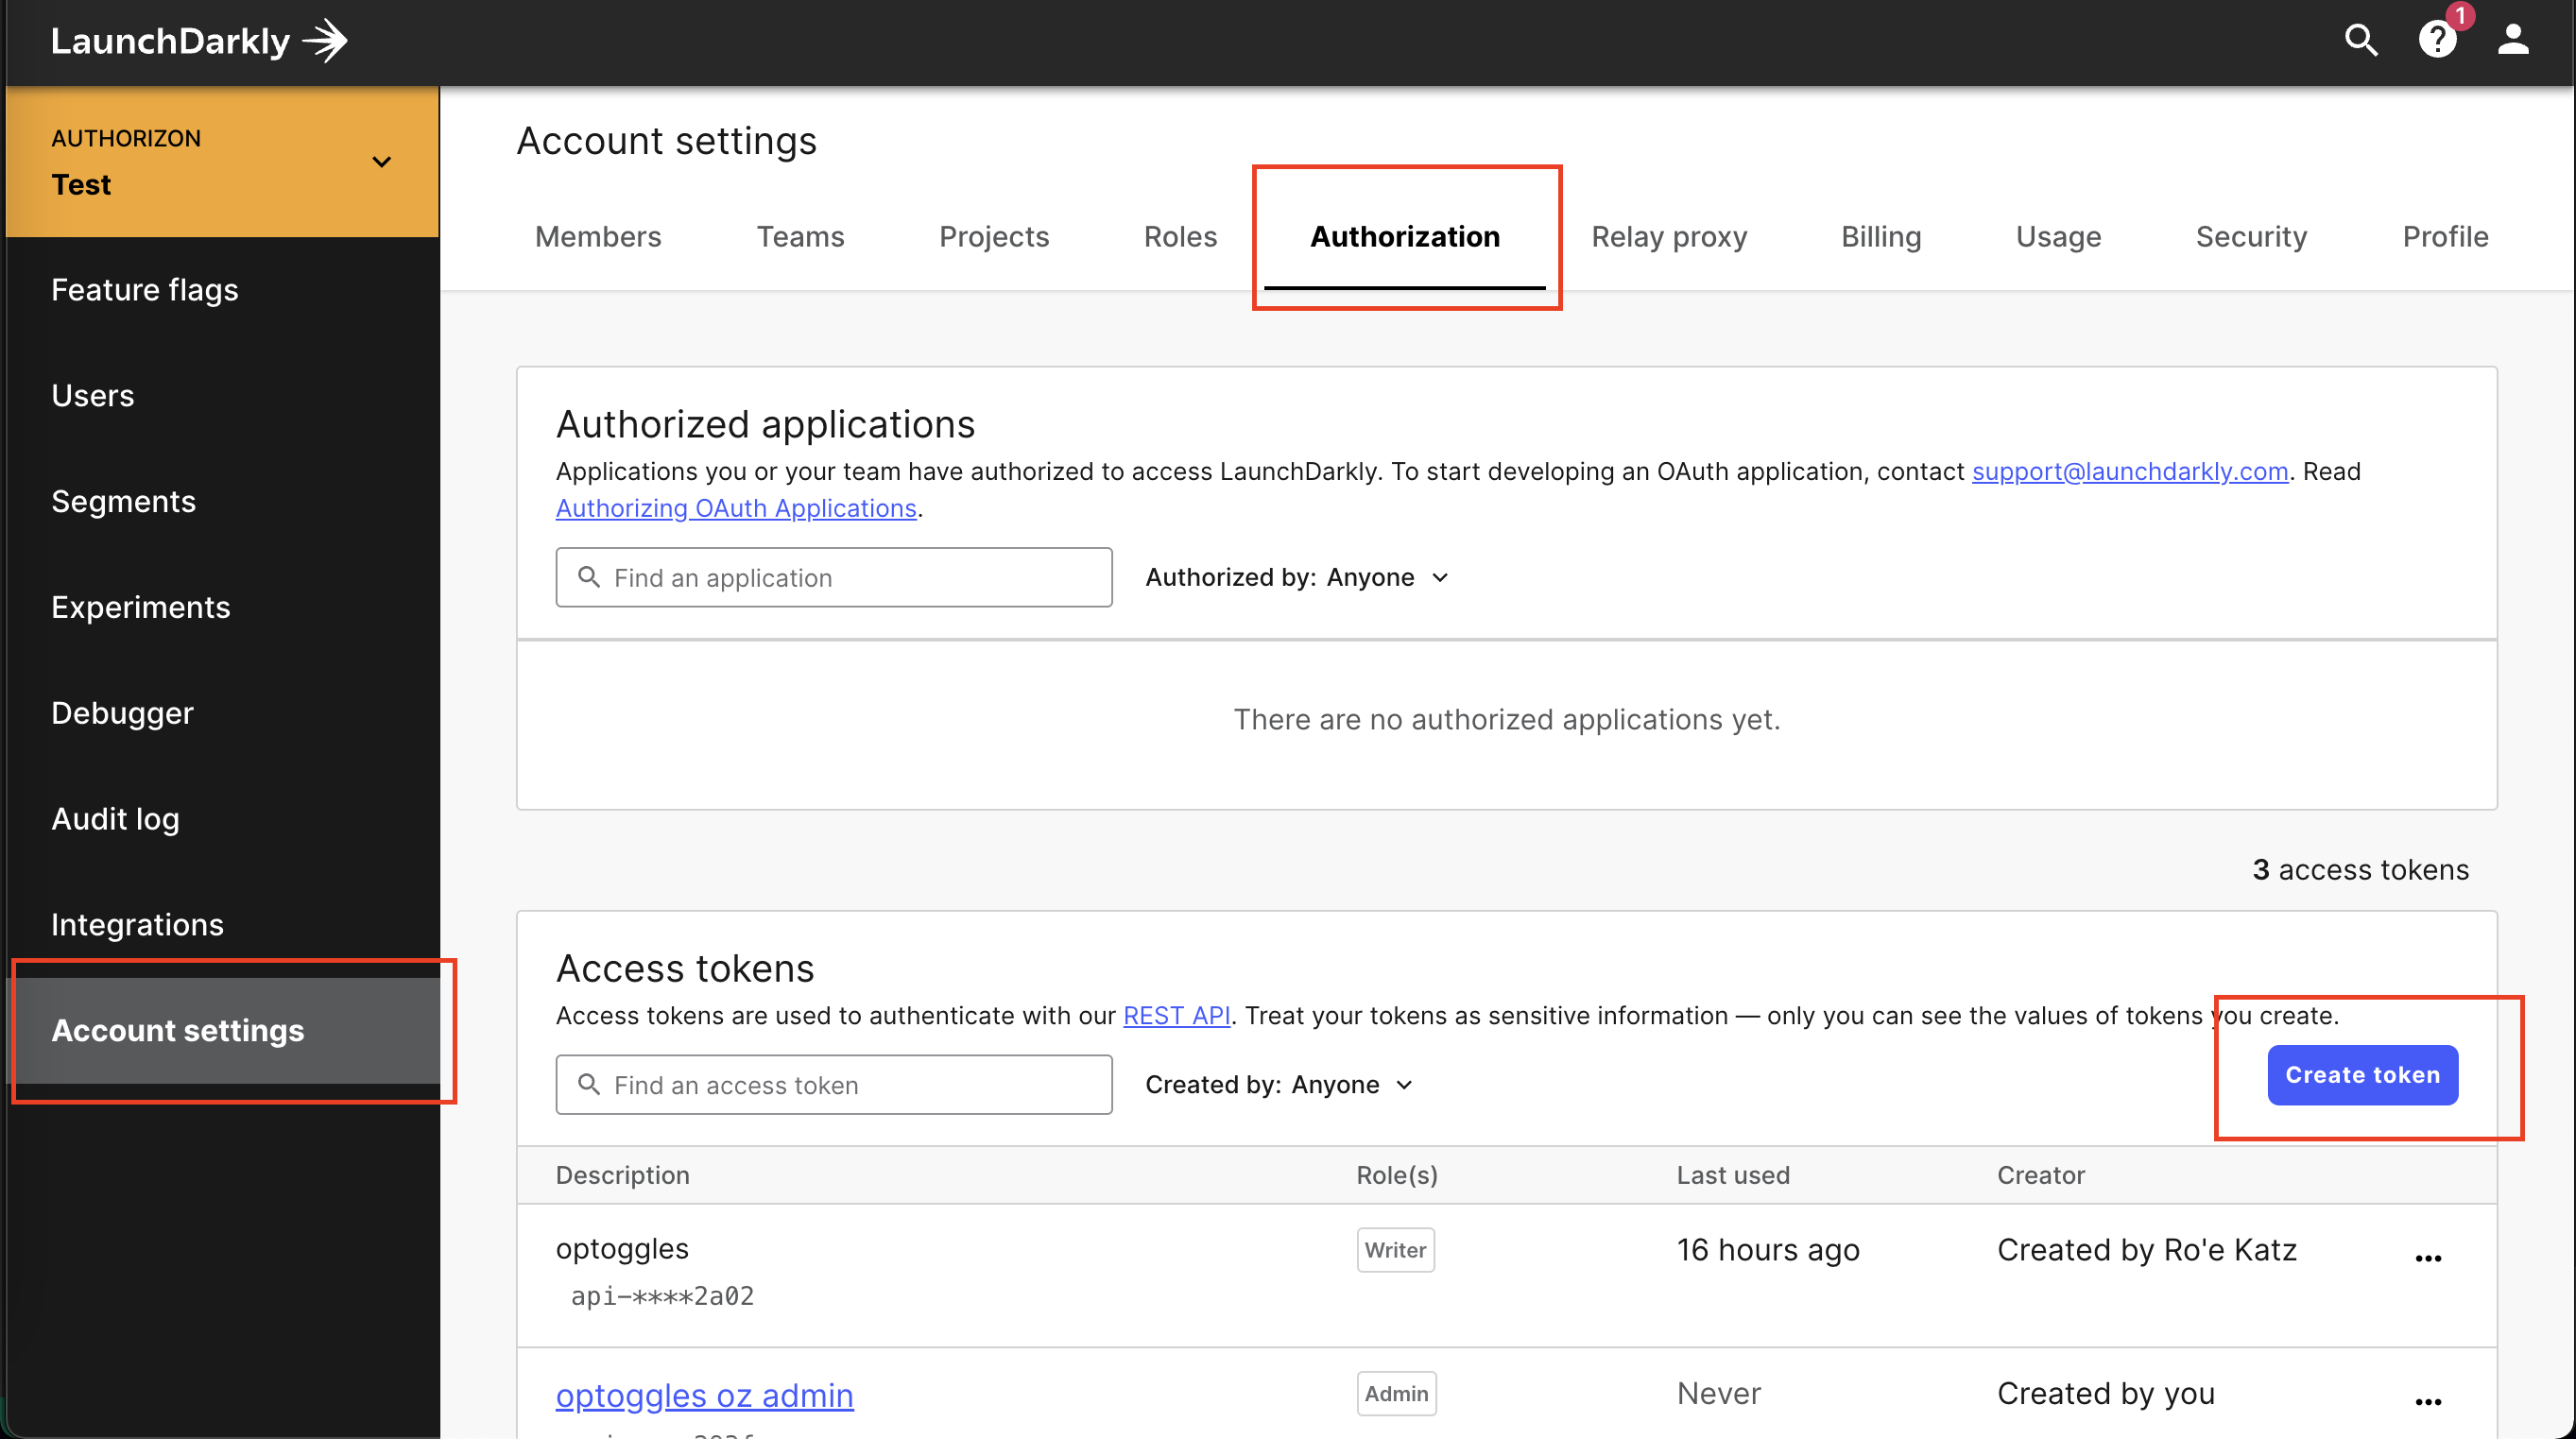
OPToggles requires your token to have Writer permissions at minimum.
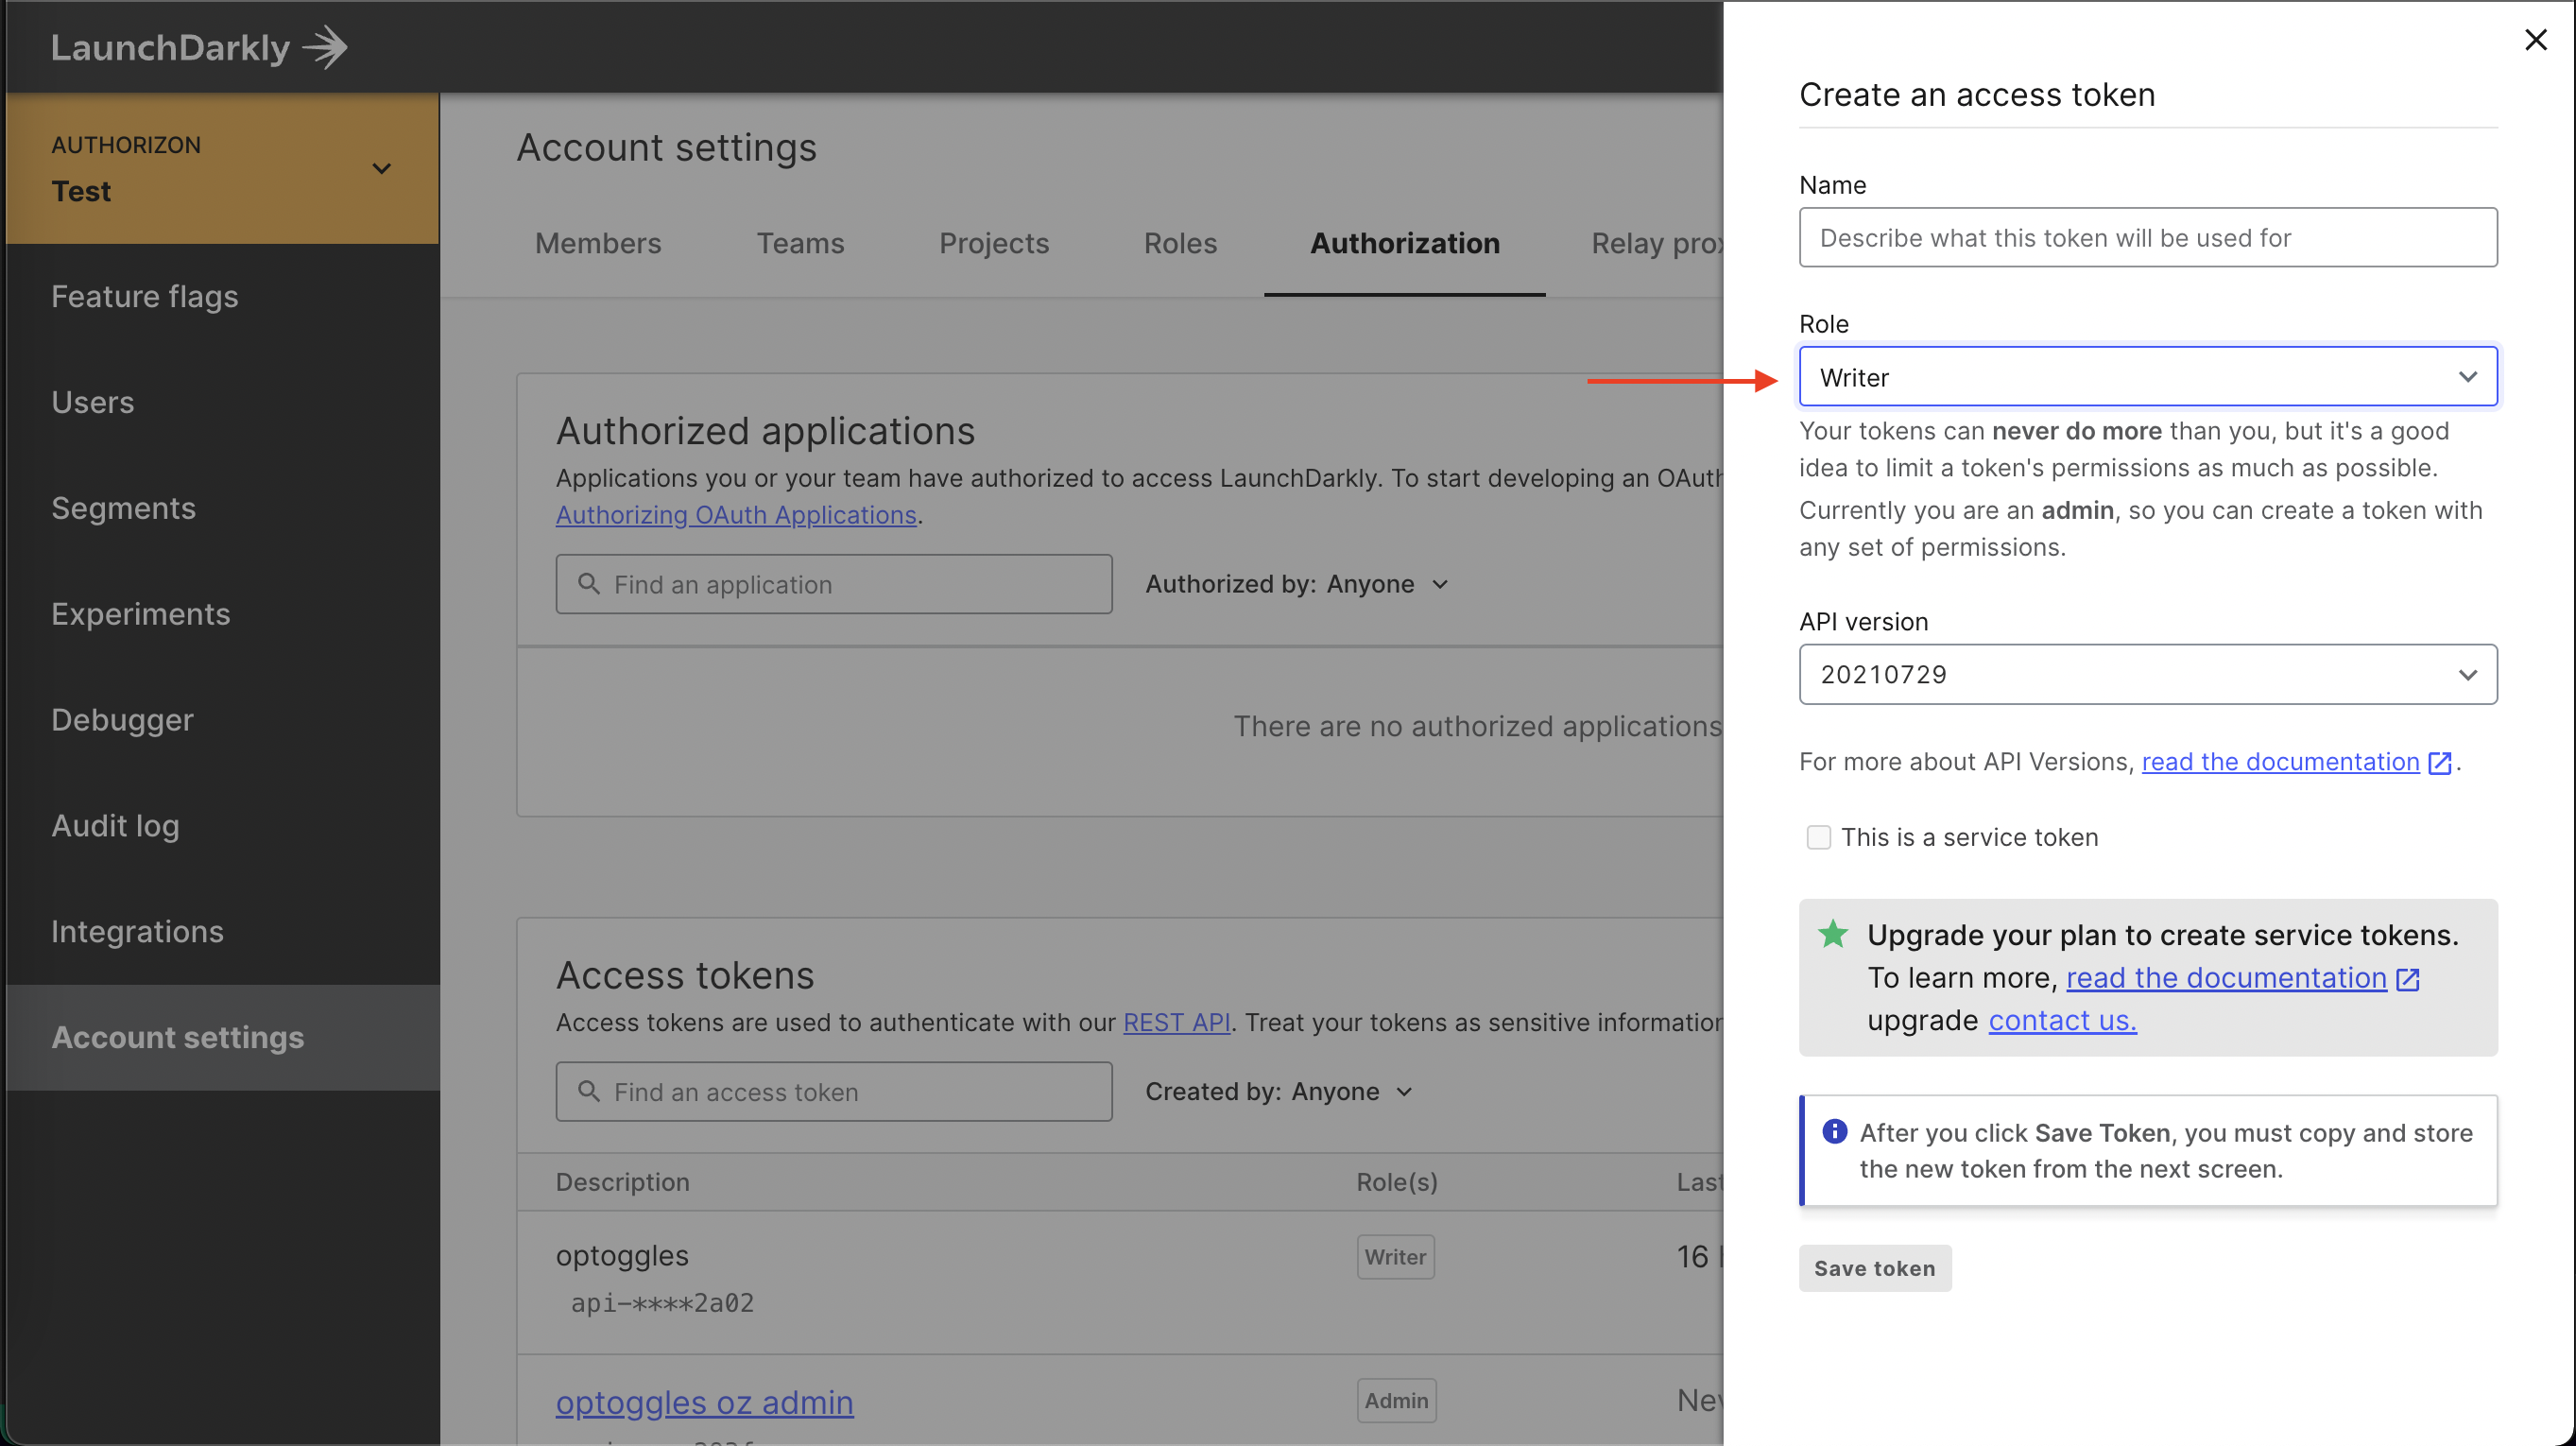
Don't loose the generated token! We're gonna need it soon.
Step 4 - Setup OPToggles
Now let's bring everything together using OPToggles. Our configuration yaml
is here.
The configuration is divided to 3 sections - sources, target, and toggles.
config Sources
sources:
  - id: example-opal
    url: http://opal_client:7000
    token: ""
    advertisedAddress: optoggles:8080
- You can have multiple sources, each should have its unique id.
- In the toggles section, we are refering to the source id under the 'source' field.
- Since we're running everything in docker-compose, we simply use the service names as hostnames (
opal_client,optoggles) - If your
OPAL Clientruns in secure mode, supply a JWT authentication token under the "token" field. Otherwise, leave token empty.
Config Target
  targetType: launchdarkly
  targetSpec:
    # Replace with your generated api token
    launchdarklyToken: "api-xxxxxxxx-xxxx-xxxx-xxxx-xxxxxxxxxxxx"
OPToggles supports two targets at the moment, LaunchDarkly and a generic Rest API. Read the configuration guide to see where to find the API key in LaunchDarkly.
Config toggles
toggles:
  - key: "us-feature"
    usersPolicy:
      source: example-opal
      package: "app.rbac"
      rule: "us_users"
    spec:
      name: "US Only Feature"
      projKey: "default"
      environments: [ "production", "test" ]
  - key: "billing-feature"
    usersPolicy:
      source: example-opal
      package: "app.rbac"
      rule: "billing_users"
    spec:
      name: "Billing Feature"
      projKey: "default"
      environments: [ "test" ]
- Each toggle's
usersPolicydefines theOPAsource. - the source must match the names from the
features.regofile.
Add OPToggles
Now we can add the OPToggles as a service to
our docker-compose:
  optoggles:
    image: permitio/optoggles:latest
    depends_on:
      - opal_client
    restart: on-failure
    volumes:
      - $PWD/launchdarkly-config.yaml:/etc/optoggles/config.yaml
Setting restart to on-failure is useful for errors on OPToggles initiation when rest of the containers are not
fully started.
Now that we have everything in place - let's bring it up!
docker-compose up -d
View our configuration guide for full understanding of its format.
Step 5 - Demo time!
If everything went well, you should see the newly created flags in your LaunchDarkly account:

Let's update bob's location to another country:
opal-client publish-data-update --src-url https://api.country.is/23.54.6.78 -t policy_data --dst-path /users/bob/locationgit:master*
And our "US Only Feature" should be immediately updated to exclude "bob"!

You can integrate these new toggles into your client-side code like you would with any other LaunchDarkly flag. If
that's your first time - https://docs.launchdarkly.com/sdk/client-side.
One last important note: the created toggles are managed by OPToggles.
Trying to make manual changes to them makes no sense as they would get overridden by OPToggles.